
You can import Tasks into Timeero using our CSV template
![]()
![]()
1. Log in to the web portal.
2. Click on Jobs & Tasks
3. Use the toggle at the top of the screen to go to the tasks page
4. Click on Import Tasks
5. Click on Download Template
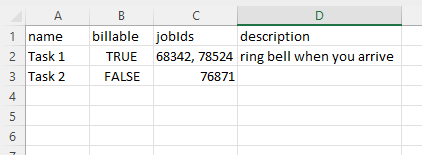
6. Do not change or add columns. Do not reformat the CSV.
7. Enter the task name in column A
8. If this is a billable task, enter TRUE in column B. If it is not a billable task, enter FALSE in column B.
9. To assign the task to specific jobs or a specific job, enter the job id(s) in column C. If column C is left empty, the task will be assigned to all jobs. You can assign one task to multiple jobs by separating each job id by a comma.
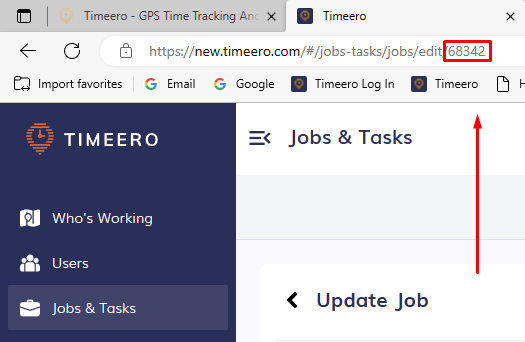
10. To locate the job id in Timeero, switch the toggle at the top of the page back to Jobs. Click on the pencil icon to the far right of the job name. Once the window is open, copy the job id from the browser and paste it into the CSV file.
11. Enter a description for your team to view
12. Save your file. It must be saved as a CSV file.
13. Click the Import Tasks button again and choose Upload CSV.