![logo - 512.png]](https://help.timeero.com/hs-fs/hubfs/logo%20-%20512.png?width=75&height=75&name=logo%20-%20512.png)

*ChatGPT requires a paid plan (Plus, Pro, Business, Enterprise, or Edu). On workspace plans, an admin may need to allow custom MCP servers first.
What do I Need to do Before Starting?
- Have your Public API key ready from Integrations → Public API → Configuration.
- MCP URL:https://mcp.timeero.com/mcp.
- Use ChatGPT in your web browser
*The steps listed here will only work with ChatGPT in the web browser. If you want to use the Desktop app, please see our other MCP ChatGPT Article.
How do I Connect Timeero in ChatGPT?
- Open ChatGPT in your web browser.
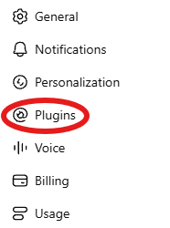
- Open Settings → Plugins.
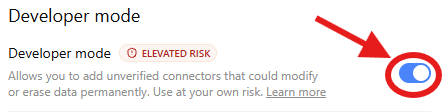
- Select Developer mode.
- Scroll down and turn on Developer mode.
- Select Plugins from the left hand side.
- Select Browse plugins.
- Click the Plus icon next to the search bar and select Create app.
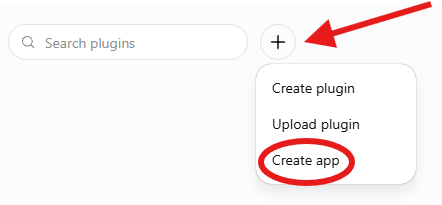
- Select Create MCP App.
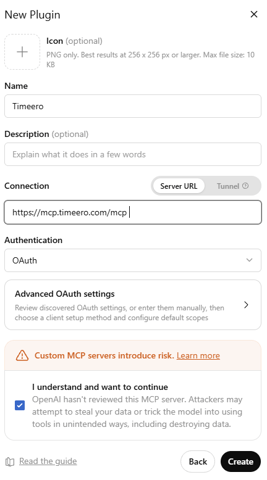
- Name it Timeero.
- Set the connection to Server URL.
- Set the MCP URL to https://mcp.timeero.com/mcp.
- Set Authentication to OAuth.
- Click the checkbox to acknowledge the risks.
- Click Create.
- Paste your Public API key and click Connect.
- On the authorize screen, choose whether ChatGPT may write and/or delete Timeero data (read access is always included).
- Click Allow access.
What do I do Once it is Enabled?
Test it out with one of the following prompts:
- “Show time and mileage for the Field Crew group last week.”
- “Who is clocked in right now?”
- “List my jobs.”
Confirm any write actions ChatGPT prompts you to approve.