Adding & Managing Tasks
Track specific duties being worked on at each job site.
-
How to properly implement tasks for all or some users.
- With tasks it is easier to keep track of employees daily work.
- The ability to import tasks manually or in-bulk.
What Are Tasks?
Tasks are a subset of jobs that can help define and clarify the work users are completing that day.
Our customers use tasks for:
- Equipment tracking ( Job: Smiths's Place / Task: Trailer A )
- Ticket tracking ( Job: Smith's Inspection / Task: Ticket # 1234 )
- Patient tasks ( Job: Helping Hands Facility / Task: Dinner Prep )
- Construction ( Job: Smith's Place / Task: Tile Install )
- Work order tracking, claims tracking, and so much more
How do employees clock into them?
When a user clocks in, they will be presented with a list of jobs to choose from.
After choosing a job, a task list will appear for the user to choose.
Only users with the Admin or Manager role can add tasks.
To enable tasks in your account, go to Company Settings > General and enable the option to Allow users to choose a task when clocking in.

Once tasks are turned on, you can start adding them for you team to choose from.
-gif-2.gif)
How do I Add Tasks?
- Go to the Jobs & Tasks page and use the toggle at the top of the screen to go to the Tasks page.

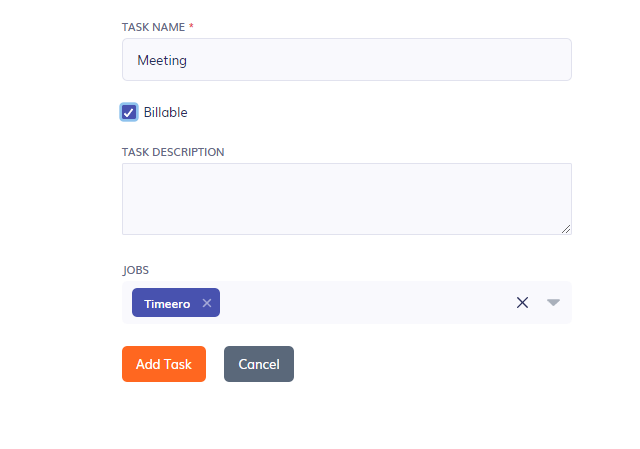
- Click the Add Task button (top right) to create a new task and assign it to a Job or multiple jobs.

- Click the Add Task button
*Marking a task as billable is for users integrating with QuickBooks Online. Rates set up in Tasks will not show in any Timeero reports.
For more information on how to Import tasks as a CSV please use this link. Importing tasks as a CSV
How do I Edit or Deactivate Tasks?
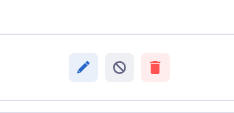
To edit or deactivate tasks, please use the pencil or circle icons (far right of your screen).
We do not recommend deleting tasks. If the task is deleted, you will no longer be able to access that data or run reports on it.
FAQs
Can I import tasks in bulk instead of adding them one by one?
You can manually input them or you can bulk import them using a csv file from the "Import Tasks" and then upload it into Timeero.
Can a Task be assigned to 1 or multiple jobs?
Yes, the admin can assign the specific tasks to certain jobs, and also to certain employees who need to work on those tasks, and are assigned to those jobs as well.
Any tips for naming tasks?
Recommended to use clear, specific names that make sense for employees to identify. So, that employees can quickly find the right task.
![logo - 512.png]](https://help.timeero.com/hs-fs/hubfs/logo%20-%20512.png?width=75&height=75&name=logo%20-%20512.png)